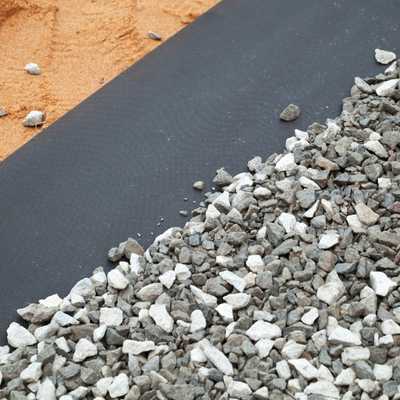
5 Tips for Perfectly Laying Geotextiles
At EasyMerchant, we purchase geotextile membranes in bulk, allowing us to offer you significant savings. However, regardless of the cost, ensuring a flawless installation is critical. Mistakes can lead to wasted materials and the hassle of redoing the job, which nobody wants.
To help you get it right the first time, we’ve compiled these five essential tips for laying geotextiles flawlessly.
Â
Tip 1: Think About Overlap Before Ordering
It's quite common for people to underestimate the amount of geotextile material needed for a project, often because they fail to account for overlaps.
The amount of overlap depends on the load capacity you're aiming for, but typically, you could lose around 5-10% of the total surface area to achieve proper alignment. This isn't usually an issue for smaller projects like driveways, but over larger areas, this could leave you short and require additional rolls if not factored in.
A general rule is to overlap sections or joints by 300 to 900mm, with the average being 500mm. Joints can be secured using waterproof tape, fixing pegs, glue, or sometimes by welding with a heat machine.
Tip 2: Allow for a Weaker Subgrade
Most geotextile guides suggest a fill depth of 8†to 12†(20cm to 30cm), but you'll likely want to increase this if you're working on a weaker subgrade.
For particularly weak or loose soils, you may need to allow for 18†(45cm) or more. It's crucial to understand your site conditions before measuring or pricing, as the difference between 12†and 18†can mean a 50% increase in fill. Planning and pricing accordingly is key.
Having adequate fill on top of the membrane prevents it from being punctured once traffic passes over it.
Tip 3: Proper Site Preparation
Preparing your site for geotextiles requires considerable effort, but it’s essential for achieving a quality result.
This might involve removing trees, roots, and other large obstructions. If you encounter weaker patches of soil, replace them with suitable granular fills or aggregates to ensure stability.
Avoid shortcuts during this phase—imperfections compound as layers are added, turning minor bumps into major unevenness by the end of the job.
Tip 4: Do a Dress Rehearsal
Once your site is prepared and smooth, it’s time to lay everything out.
Don’t rush into securing the membranes until you've positioned everything correctly. Even on a windy day, you can weigh them down temporarily—just don’t start pinning or joining until you’re sure everything is perfect.
If you encounter unexpected issues during your trial run, simply roll everything back up. Starting to pin, tape, or stitch makes undoing your work a real headache.
Tip 5: Secure Your Corners
Once you’re confident you’re ready to start laying your geotextiles and have planned your joins and overlaps, it’s time to secure them.
Typically, landscape group staples or plastic ground fixing pegs are used (though glues or tapes can also work). After securing the starting point, apply the appropriate tension to the sheet—consult the manufacturer’s instructions for guidance. Generally, you’ll want it tight enough to prevent creases or bunching, which could compromise the layer you’ve created.
Need Any Help?
At EasyMerchant, we don’t just sell Terram geotextiles—we know every product inside out. Whether you’re at the planning stage and need advice on selecting the right type of geotextile or have a last-minute question while watching an excavator prepare your site, we’re here to assist.
Author Bio
Nathan Wilde

Nathan has over 12 years of experience in the drainage and plastics industries. Having worked for both builders' merchants and major manufacturers, he brings significant industry knowledge. At EasyMerchant, Nathan is dedicated to simplifying life for tradespeople.
Â
Shop Geotextile Membranes
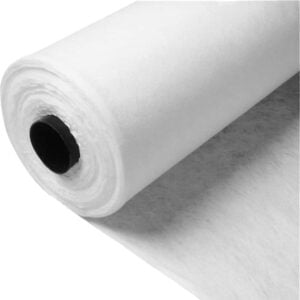
Terram T1000 Non Woven Geotextile Membrane – Custom Size
*Prices subject to change without notice.
It is a typical silicate material made of natural raw materials such as feldspar, clay and quartz. The main constituent elements are silicon, aluminum and oxygen. These three elements account for 90% of the total amount of crust elements. Low cost and mature technology. Such ceramics can be divided into daily-use ceramics, architectural ceramics, electrical insulating ceramics, chemical ceramics, etc. according to their performance characteristics and uses. It is made of high-purity synthetic raw materials and is formed by precision control process. It generally has some special properties to meet various needs. According to its main components, there are oxide ceramics, nitride ceramics, carbide ceramics, cermets, etc.; special ceramics have special mechanical, optical, acoustic, electrical, magnetic, thermal and other properties. According to different uses, special ceramic materials can be divided into structural ceramics, tool ceramics, and functional ceramics.
Other Materials,Zirconia Porous Ceramic Foam Filters,Silicon Carbide Ceramic,Sic Ceramic Moulds
Dongguan Haikun New Material Co., Ltd. , https://www.hkceram.com